Christopher Kimball’s Milk Street Television
The Weekend Baker
9/10/2024 | 25m 50sVideo has Closed Captions
Milk Street tackles "project baking" with kolaches and chocolate and tahini babka.
Milk Street takes "project baking" to new and exciting heights. First, Christopher Kimball makes Kolaches, Czech-American breakfast treats filled with cream cheese and jam. Rose Hattabaugh bakes Chocolate and Tahini Babka, a creative twist on the braided bread. Plus, Wes Martin shares the secret to proofing your dough in a cold kitchen and Rosemary Gill offers a lesson on Yeast 101.
Problems with Closed Captions? Closed Captioning Feedback
Problems with Closed Captions? Closed Captioning Feedback
Christopher Kimball’s Milk Street Television is presented by your local public television station.
Distributed nationally by American Public Television
Christopher Kimball’s Milk Street Television
The Weekend Baker
9/10/2024 | 25m 50sVideo has Closed Captions
Milk Street takes "project baking" to new and exciting heights. First, Christopher Kimball makes Kolaches, Czech-American breakfast treats filled with cream cheese and jam. Rose Hattabaugh bakes Chocolate and Tahini Babka, a creative twist on the braided bread. Plus, Wes Martin shares the secret to proofing your dough in a cold kitchen and Rosemary Gill offers a lesson on Yeast 101.
Problems with Closed Captions? Closed Captioning Feedback
How to Watch Christopher Kimball’s Milk Street Television
Christopher Kimball’s Milk Street Television is available to stream on pbs.org and the free PBS App, available on iPhone, Apple TV, Android TV, Android smartphones, Amazon Fire TV, Amazon Fire Tablet, Roku, Samsung Smart TV, and Vizio.
Providing Support for PBS.org
Learn Moreabout PBS online sponsorship♪ ♪ - So, if you don't love American danish, you might want to try a kolache.
Absolutely delicious, and it's mostly about the bread.
A little cream cheese, a little jam.
Great balance, great flavor, and I think the world's best danish.
- The bread proofed in the warmer environment, I can already tell is much lighter and fluffier.
And that looks like a beautiful piece of bread for toast.
- So we can see the chocolate swirls, the little bits of chocolate.
So if you're looking for that weekend bakery project that looks really professional, takes a little bit of time, but it's really easy, this is the recipe for you.
The chocolate and tahini with the delicious brioche-y bread is the perfect project for that, and you will look like a rock star.
♪ ♪ ♪ ♪ ♪ ♪ - You know, I love weekend baking projects, especially on a Sunday afternoon.
So, today on Milk Street, we're going to do two of my favorite recipes.
The first is kolaches.
Now, I don't like danish, and the reason I don't like danish is it's much too sweet.
So, this is like a danish for grownups.
It's a Czech recipe, very popular in Texas.
It's a sweet yeasted dough, which is baked with cream cheese and a little jam in the center.
They're absolutely delicious.
Then we're going to do something even more interesting, which is babka, which again is a sweet yeast dough, which is filled, braided, and baked like a loaf.
And we're going to use chocolate and tahini in our babka.
And finally, we're going to do a little bit of investigation into how to make yeasted breads in a cold kitchen.
So, please stay tuned as we figure out how to have some fun in the kitchen with two great baking projects.
- Funding for this series was provided by the following: - MOWI salmon comes ready to cook, ready to grill, ready to season, or pre-seasoned and ready to eat.
In an assortment of flavors for an assortment of people.
MOWI Salmon.
- We pass down traditions here.
We create and connect.
We enjoy special moments-- some simple, some grand.
The heart of your home is the kitchen.
The heart of your kitchen is The Galley.
♪ ♪ - So the original danish was actually laminated doughs, you know, like a puff pastry.
So, it was serious baking, and it was all about, really, the dough and the bread.
So, let's get back to the original concept.
Now, kolaches is a Czech pastry, but this is my idea of a danish that you really want to eat because it has a good balance.
It's mostly about the bread, a little cream cheese, little jam.
but you're going to actually enjoy eating it and not have half your teeth pulled six months later because of all the sugar.
So we have dry ingredients, obviously the flour.
It's a sweet yeasted dough.
A little salt and yeast.
This has to be either a rapid rise or instant yeast.
If it's just a regular active yeast, you would have to proof that first.
So put that in and just mix up the dry ingredients a little.
(whirring) Okay.
So we have eggs, we have milk.
We'll get those started first.
Melted butter.
I did say rich dough, didn't I?
And a little lemon zest.
Okay, so we're going to lock this in and we'll drizzle in the very rich liquid slowly, with this on low.
(whirring) I'm going to scrape down just a little bit.
Once this gets mixed in, we'll pump up the speed to medium, medium high.
And you can tell this is a really pretty wet dough.
It's nice and stretchy.
It's a little bit glossy, it's a very wet dough.
Now, before I let it proof in the bowl, go like that.
Get it off the bottom.
So we're going to let this proof in the bowl itself, cover it.
45 minutes, room temperature.
It won't quite double.
Then in the fridge, we're actually going to let this sit overnight.
And it's such a sticky dough, it's so wet, it's not going to work if it's at room temperature.
So we're going to actually use a very cold dough for shaping.
Cold dough.
But first, it's still a sticky dough.
We want to put a fair amount of flour down.
We're going to have to get this dough out, we're going to have to divide it into 12 parts, pieces.
What I like to do is to roll it, sort of into a log as evenly as possible.
And that gives me a pretty good idea of how to do this.
So, okay... (chopping) This, this dough really feels good.
It is nice and... soft.
It's a pleasure to work with.
Nice and cold.
Okay.
Actually, I'm going to get rid of some of this flour now, because you actually want the dough to stick a little bit to the wood surface as you do this.
♪ ♪ Okay, so we're going to cover this with plastic wrap.
I'm going to spray this a little bit.
If you have three hands, that's really helpful here.
(spraying) And what you don't want to do is cover it tightly, because as this rises, you want to have some give.
So this rests for an hour to an hour and a half.
Kitchen towel on top as well.
And you know it's done when you just hit it with your finger a little bit, and that impression should stay in the dough.
♪ ♪ So, we're not finished letting these proof, but we're going to go ahead and get started on the cream cheese filling.
Cream cheese, powdered sugar, lemon zest.
Some lemon juice.
Now we're going to make a little streusel, which is usually flour, butter, and sugar.
It's best done with the hands.
I was at my father-in-law's in Maine, and he just moved into a small house, and he had almost no kitchen equipment.
So I had to make a pie dough.
No food processor, no pastry cutter.
Just had to do with my hands and butter.
It turned out, actually.
I'm going to go back to that method.
It took four minutes, maybe to do, and the dough was great.
And then I went to look for the rolling pin, and of course there was no rolling pin.
So I had to get a wine bottle out, and I had to roll out the dough with a wine bottle, and that worked, too.
Okay, that's good.
And then a little water, egg.
And we'll use this as a glaze when the dough is ready.
So we're going to put these in the fridge right away, let them chill.
Meanwhile, these will come up to speed, and we'll test them to see if they're ready.
And then we'll go ahead and fill the kolaches.
So we're just going to make a depression there, and it doesn't bounce right back up, so, it's good.
One of the things I love about working with yeast dough is every step along the way, maybe it doesn't look great, and then you come back and it looks great.
It's very forgiving.
So we have three different kinds of jams, so we'll make four of each.
We're going to use a little bit of the egg wash.
So we're going to fill it with cream cheese, and then twirl it a little bit to make room for some jam on top of that.
Now, this streusel you don't have to use, but at least we're not coating this with a bunch of sugar frosting.
How'd I do?
Did pretty well.
So 350 oven, about 20 minutes.
We're almost there.
So these are slightly cooled.
At least I can pick up the pan.
So, I mean, not bad, okay?
The other thing you notice right away is this is mostly about the bread itself, right?
I mean, as I said, Danish, I don't like it because it's mostly sugar and filling.
So there you go.
Mm.
That's really good.
It's about balance, right?
It's having sweet yeasted bread, just a little bit of cream cheese, a little bit of jam to give it a little bit of a punch to it.
But this is the kind of thing you could definitely have with a cup of coffee, without just sugar on sugar on sugar.
So, if you don't love American danish, you might want to try a kolache.
Absolutely delicious, and it's mostly about the bread.
A little cream cheese, a little jam.
Great balance, great flavor, and I think the world's best danish.
♪ ♪ (phone ringing) - Hi, my name is Mary.
I'm from Kalamazoo, Michigan, and I'm a relatively new bread baker.
I was doing fairly good, but then I could not get a good rise, because we tend to have a house that's 65.
So what I was doing is I was using the proofing setting on my oven.
And I'm still not getting a good rise whatsoever.
- So, a professional baker might have what's called a proofing box.
It's a big, tall metal cabinet that is temperature controlled and moisture controlled.
They can pump humidity into there and keep the temperature at a constant.
But if you're in a cold house, that can be very tricky.
So what can you do?
Well, there's a couple of options.
What you can do is turn your oven on very briefly, put it at the lowest temperature setting, 100 or 125, for just a minute or two, and shut it off.
The last thing you want to do is for it to get too hot.
Yeast will die at 120 degrees, so you do not want to put it in an environment that is warmer than that.
Once you've got a little bit of residual heat in there and it feels warm to your hand, you can just pop the bowl of dough in and proof it, the first rise.
The problem with this method, though, is what do you gotta do after you proof it?
You've gotta bake in there, so you can't proof in here in the second rise.
So if you're taking your dough out, shaping your rolls, and you have a very cold kitchen, you're in trouble.
Then what?
So the other option you can do is to utilize your microwave.
This is a very airtight environment.
You can put your dough in here.
In this case, I would not turn it on.
What I would do is just put a little jar or bowl, glass bowl, of very hot water in here and close it.
That will give you a nice, warm, steamy environment for your yeasted bread dough to rise.
Now, what if you have a teeny, tiny microwave and you can't fit a big bowl like this in there?
Well, there are more options.
One of the most handy items we could find was a plastic storage bin.
So, what I've done here is I put two batches of dough in these at the same time.
In one of the boxes, I put a bowl of ice, and I've got a thermometer in there.
And that environment right now is 64 degrees.
That is typically what a cold house is going to be in the winter.
The other box, I put a bowl, poured some hot tap water in.
This has a really nice steady temperature of 75 degrees.
In fact, you can see the condensation in here.
A really nice, moist environment.
And that bread is going to poof up in no time.
And you can see a much slower rise in the cold environment versus the warm environment.
So, pretty obvious to see here.
This loaf was proofed in a colder environment, and it just didn't have enough oomph, it was too cold.
The other one was proofed in a warm environment, about 75 degrees.
And it's very, very light and nice.
And we'll cut these open, and I can show you the difference.
So our first underproofed loaf, not bad.
Toasted up, probably would be just fine, but it is a little dense and it is a little rubbery.
The bread proofed in the warmer environment, I can already tell is much lighter and fluffier.
And that looks like a beautiful piece of bread for toast.
So if you are climate-challenged in your house when you want to bake bread, you've got a cold kitchen, a few options: you can use your oven, put a little bit of heat in there first before you put the bread dough in.
Or the microwave is a nice airtight environment if you can fit two bowls in there.
Or run down to the basement and get one of those storage containers.
If you've got two bowls that will fit underneath there, a little hot water in one and your bread dough in the other, and you'll be all set.
♪ ♪ - Jewish-inspired babkas were created to use up extra challah dough in bakeries.
Because they had to keep kosher, the doughs and the toppings were often oil-based.
But now, all across the globe, people are reinventing the babka with buttery and creative toppings and fillings.
We wanted to go that route and create something that was really plush and buttery, And we came up with two really delicious versions.
Today, I'm gonna make the chocolate tahini version for you.
This is a lot of preparation, but it's not difficult, and it's really a great recipe to kind of start on a Saturday, and then on Sunday morning, you're pulling this beautiful babka out of the oven.
So let's get started.
The first thing you want to do is make the dough.
I've got the flour in the mixer.
I'm adding the sugar and some salt.
I'm just going to mix those up briefly.
(whirring) I've got two eggs, two yolks.
I've got some milk... vanilla... and our yeast.
So I'm going to whisk these together.
Just going to add that slowly.
(mixer humming) So this is gonna make kind of a craggly dough.
This is just gonna go for about two minutes.
You really wanna make sure everything is room temperature for this, because it will just mix together better, especially the butter.
And so it looks like all of our flour is incorporated, and now I'm gonna start adding my butter a few tablespoons at a time.
Turn that up a little.
Wait until it's mostly combined before you add more butter.
You really need to let it beat for seven to nine or ten minutes so that it will start to come together and pull away from the sides of the bowl.
So I think our dough is pretty much ready.
Pick it up.
See, it's holding a little bit of a rope there.
You want it to start to rise for about half an hour, 45 minutes, just to get the yeast going.
And then I'm gonna cover it and put it in the refrigerator for six to 24 hours.
Usually I'll just put this in the fridge overnight.
It's a little bit easier than trying to time it in one day.
Okay, so we're gonna let it rise a little bit, and then I'll put it in the fridge.
Before you're ready to shape your babka, you wanna make the filling.
So, we're gonna start with some butter and some milk in a small saucepan.
On about medium heat until the butter is melted and our milk and butter are nice and warm.
So our milk and butter are melted.
I'm just gonna give them a minute to cool down just a tad.
And while I'm doing that, I'm gonna whisk together my confectionery sugar, cocoa powder, espresso powder-- any kind of coffee always amps up chocolate a little bit, so we've added some here.
And, of course, a little bit of salt.
I'm gonna whisk that together.
So we are going to add tahini to this, but tahini can be a little bit finicky.
Having worked with it a lot here at Milk Street, it can seize up.
So make sure you use your warm butter and your milk to kind of melt the sugar and the cocoa powder a little bit before you add the tahini.
So, I'm going to add my tahini.
And a little bit of vanilla.
And it smells so good.
So, here we have our filling.
I'm gonna put that aside and go get my dough out of the fridge.
♪ ♪ Okay, we have our dough from the fridge.
It's nice and cold.
It rose a little bit overnight.
I'm gonna put a little bit of flour on my board.
So what we're gonna do is cut this in half, because we're gonna make two babkas with this recipe.
And then while you're making the first babka, keep the other dough refrigerated, because it really is so much easier to work with when it is cold.
So, here's our dough.
I'm going to press it into a six by eight-inch rectangle, roughly.
And then I want to roll it into a 12 by 18 rectangle.
It does not have to be a perfect rectangle.
It's going to be rolled and put in a pan, it will be fine.
All right, So now, we're going to add our filling.
Again, because we have two babkas, we only want to use half of the filling.
So I'm gonna pour some of that on there.
And then I'm gonna use an offset spatula to spread it all the way to the edge, except leave about an inch at the top, so it will seal properly.
And then four ounces of bittersweet chocolate.
We're gonna use about two ounces, so half of that.
So we're gonna sprinkle that over the top.
So now, I'm going to roll it.
Try to roll it as tightly as you can.
If you pull it towards you a little bit, it kind of helps with that.
And when you get to the top, just kind of pinch the ends together.
And there might be parts of it that are thicker than others, so if you roll it a little bit and just use your hands to kind of even it out.
So, this looks pretty good.
Now I'm going to cut this in half.
To do this, you want a really nice, sharp chef's knife.
Just press down.
Don't try to saw it, because it's going to be really hard to cut through the chunks of chocolate if you do that.
And then you can see, we can see the chocolate.
And I wanna turn these right side up.
And then, here's the fun part: So what you wanna do is cross them in the center.
Once you've crossed it, you want to twist each side about three to five times.
Sometimes I can do it six times, it just depends.
But if you can get some nice twists in there, that's really what makes the bread look beautiful.
And try to keep the babka face-up, and then tuck it under just a little bit.
So this obviously is too big to fit in our 9 x 5 pans, which we have buttered, and we've added a little bit of a sling here.
So what you want to do is you want to press it together like an accordion, and then commit.
Just pick it up and put it in the pan.
(chuckles) We've got this in now.
And then, once it's in, what I'll try to do sometimes is you move it around a little to make it a little more even if you want to, but that's it.
So now I'm gonna shape the second one.
So both babkas are done.
I'm placing them on a rimmed baking sheet, leaving a little bit of space in between them so air can circulate, and also so that nothing will drip on the bottom of your oven.
So I'm gonna cover this with a towel.
I'm gonna let them rise for about an hour to an hour and a half, until they reach the top of the pan, and then we'll bake them.
So it's been a little over an hour.
So exciting.
Aren't they beautiful?
So these are gonna go in a 350-degree oven for 30 minutes, and then we're going to turn the pans around, cover them with a little bit of foil for about another ten minutes.
So let me get them in the oven right now.
When you make babka, you usually brush the top and the sides with a simple syrup.
That kind of keeps them fresh for a little bit longer.
And I'm gonna make that right now, while these are in the oven.
So, we've got sugar... some water, and we have actually a little bit of espresso powder, because we have some of that in the babka, So I'm putting some of that in.
And this is on medium heat.
And we're just going to heat it until the sugar dissolves.
Okay, these are done.
I've temped the center of these.
I like them to be about 190 to 200 to make sure they're done all the way through, and these are.
So I'm gonna brush these right out of the oven, So it can absorb some of that simple syrup.
Don't they look amazing?
I love these babka.
And we're gonna let them sit for about 30 minutes before we take them out of the pan.
So, it's been 30 minutes.
I'm gonna put these on the rack, and you can see how handy this little sling is-- they come right out of the pan.
And...
I'm gonna brush the rest of the babka with the simple syrup, and that will help keep it fresh longer.
And then we're just gonna let these cool completely on the rack.
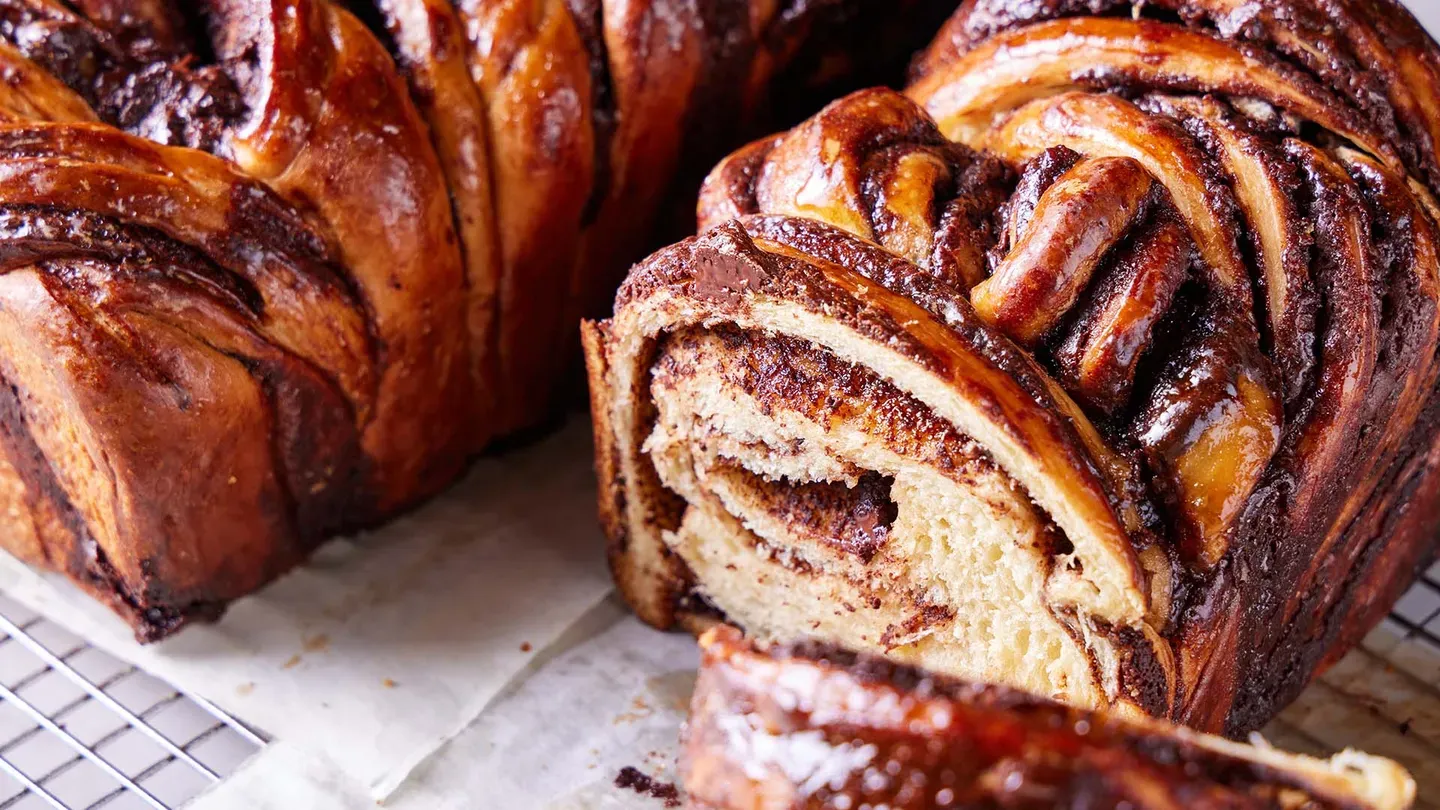
So, let's slice into this... and see how it looks.
So we can see the chocolate swirls, the little bits of chocolate, the beautiful brioche-y dough.
Mm.
Chocolate and tahini, that-- with the brioche-y bread-- is so good.
So if you're looking for that weekend bakery project that looks really professional, takes a little bit of time, but it's really easy, this is the recipe for you.
The chocolate and tahini with the delicious brioche-y bread is the perfect project for that, and you will look like a rock star.
So for this and all the recipes for this season, go to MilkStreetTV.com.
- Recipes and episodes from this season of Milk Street are available at MilkStreetTV.com, along with shopping lists, printer-ready recipes, and step-by-step videos.
Access our content anytime to change the way you cook.
- The new Milk Street Cookbook is now available and includes every recipe from our TV show.
From cacio e pepe and skillet spanakopita, to Brazilian-style carrot cake and Thai coconut soup, the Milk Street Cookbook offers bolder, fresher, simpler recipes.
Order your copy of the Milk Street Cookbook for $27, 40% less than the cover price.
Call 855-MILK-177 or order online.
- Funding for this series was provided by the following: - MOWI salmon comes ready to cook, ready to grill, ready to season, or pre-seasoned and ready to eat.
In an assortment of flavors for an assortment of people.
MOWI Salmon.
- We pass down traditions here.
We create and connect.
We enjoy special moments-- some simple, some grand.
The heart of your home is the kitchen.
The heart of your kitchen is The Galley.
♪ ♪ ♪ ♪


Christopher Kimball’s Milk Street Television is presented by your local public television station.
Distributed nationally by American Public Television